How to save Revision Cloud and Revision Table in a template (Applicability HyDraw CAD 2020/2021)
Steps to save Revision Cloud and Revision Table in a template:
- Open HyDraw CAD.
- Click on New.
The Select Template dialog displays. - Select the template and click Open.
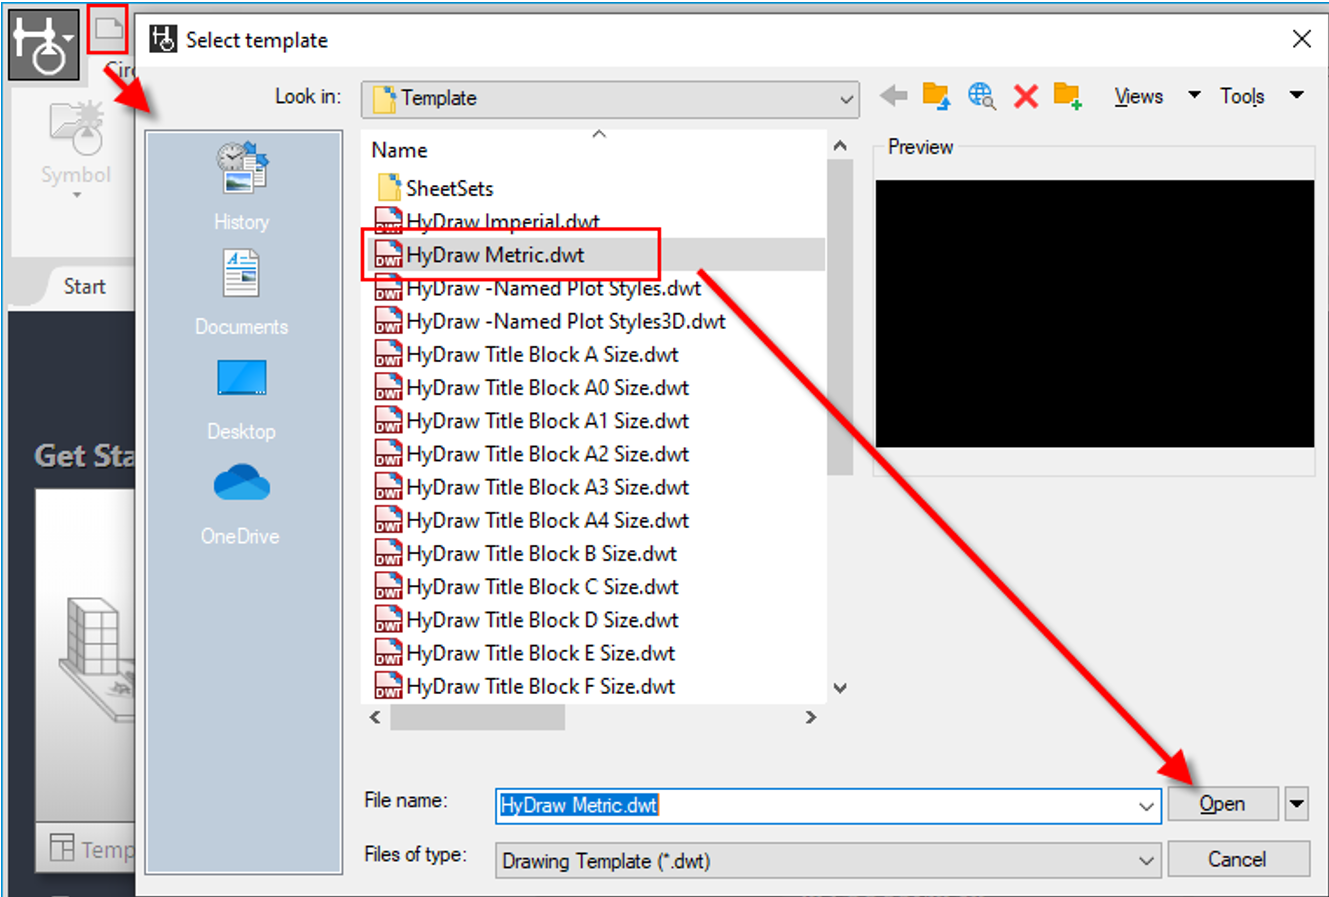
4. Go to the Annotate Ribbon menu and click Table.

- Customize the table as per the requirement and insert it in the opened drawing.
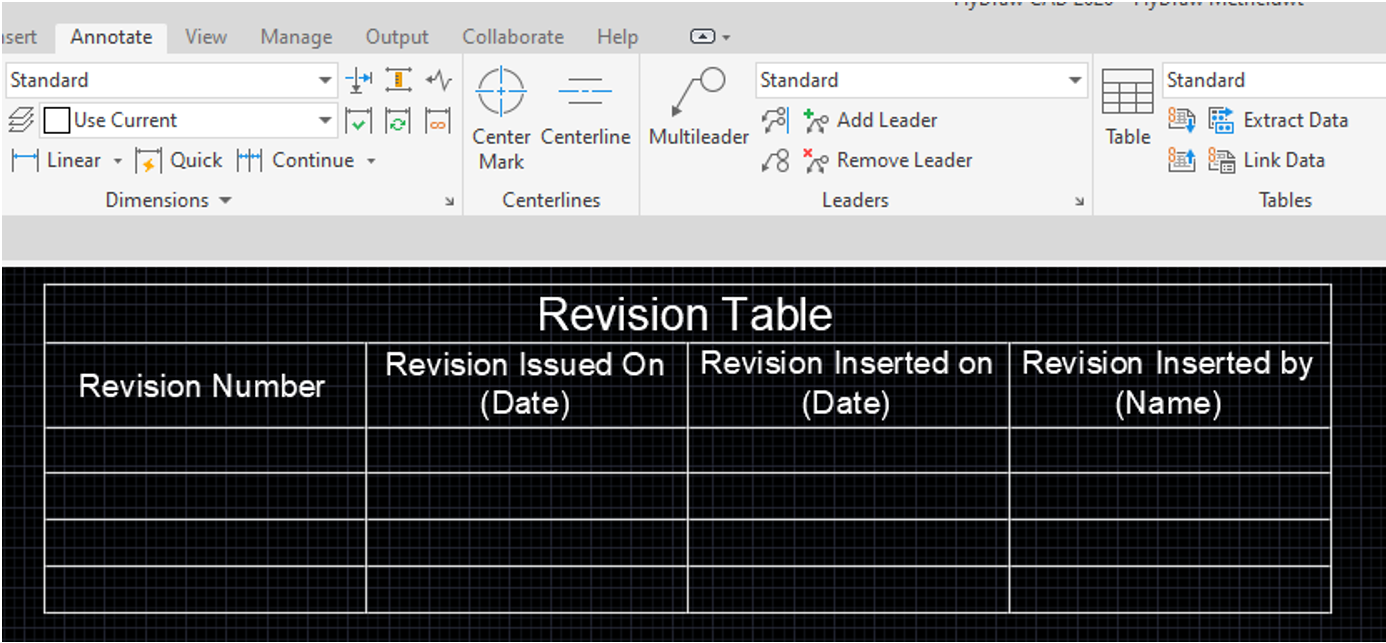
- Similarly, create the Revision Cloud from the Markup option under the Annotate tab and insert it in the same drawing.

7. Click Save As.
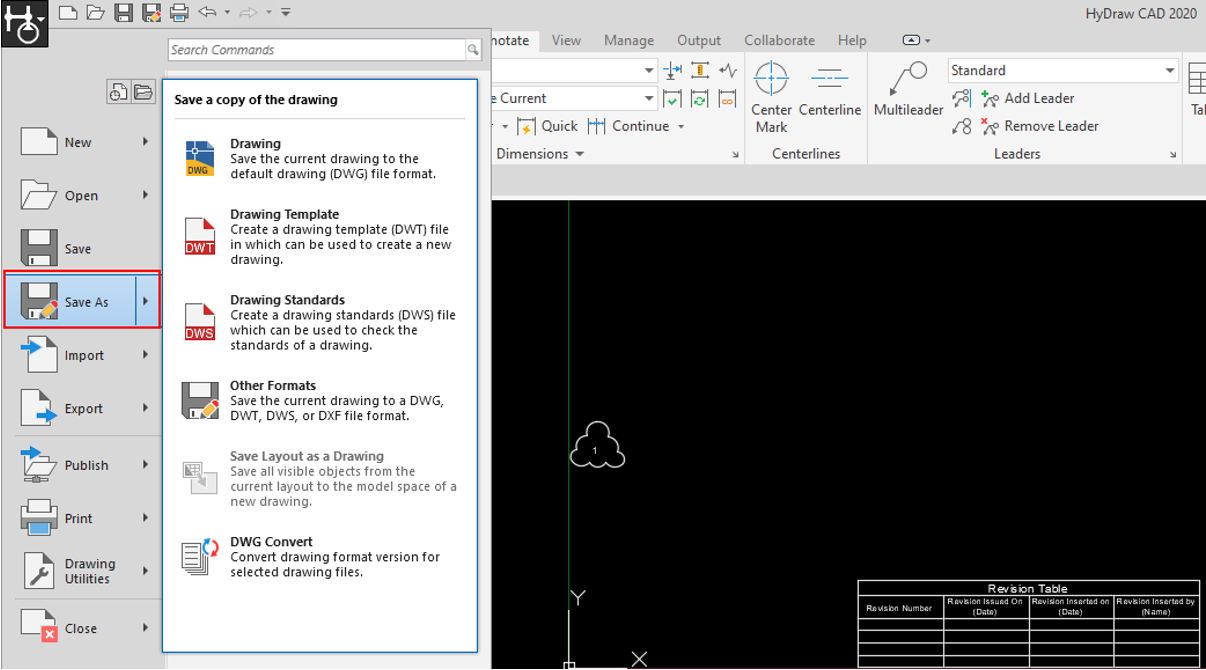
- In the dialog, select the .dwt file type, give the file name, and select Save.
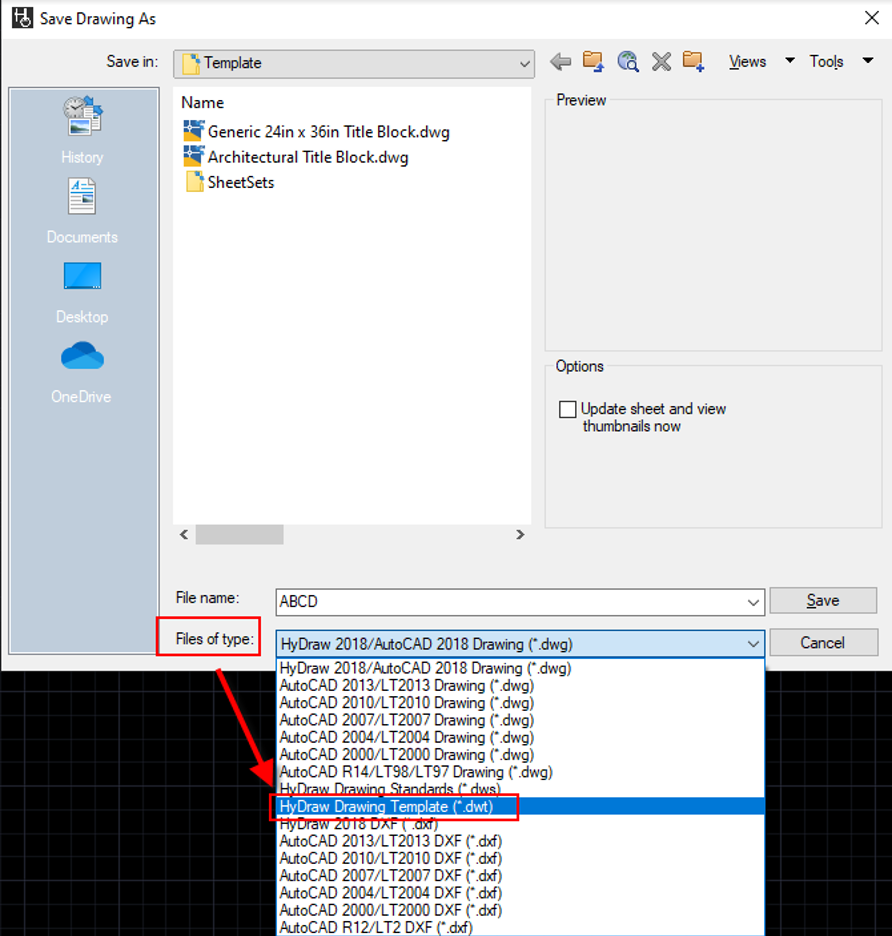
9. Click OK in the following prompt.
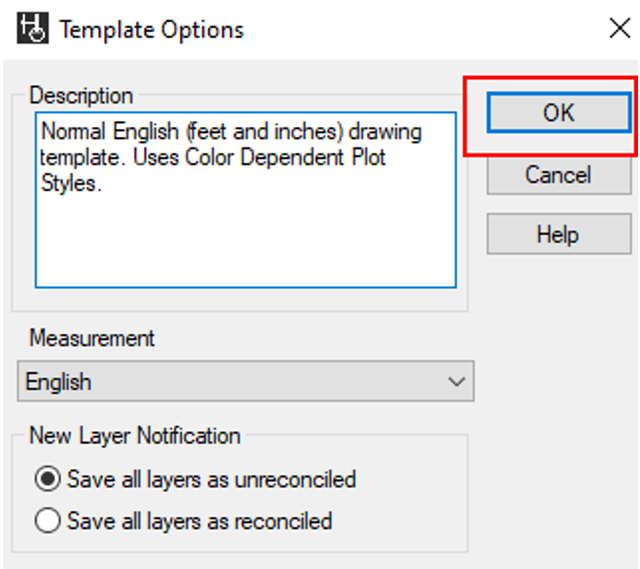
- The Revision Table and Revision Cloud are saved in the template.
- To check, go to New, select the template you created, and click Open. It already has the Revision Table and Revision Cloud.
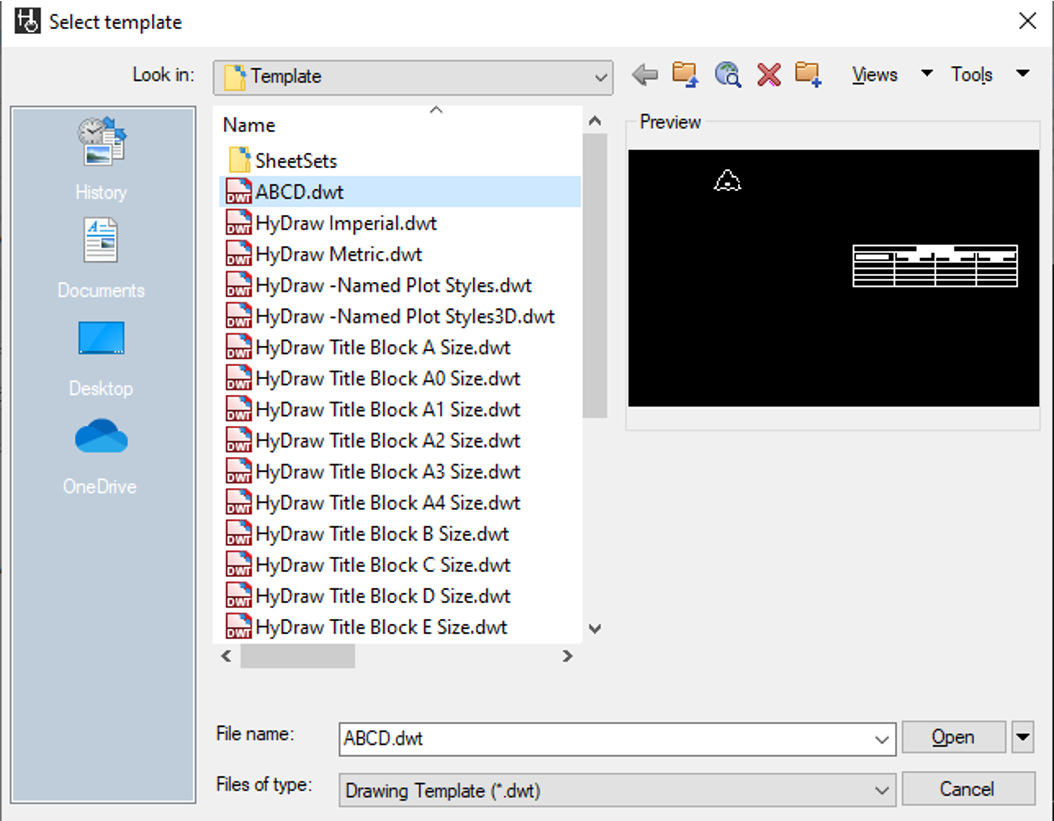
12. Now you can use this template for creating different drawings.
Related Articles
How can I use a Cloud Storage system with my HyDraw Library?
Standard Microsoft Access library does not work well with cloud storage. The reason is that with cloud storage the files are replicated locally/online and this creates conflict copies of databases. If you want to use library in cloud, you must: 1. ...HyDraw CAD Metric and Imperial standard Templates
Latest HyDraw CAD standard templates for Imperial and Metric can be downloaded from the attachment. Download the zip file, unzip and place the template files (.dwt) at the desired location. Default template path location: ...Upon opening a title block, an unhandled exception error appears
Issue: Upon using the 'Insert Title Block' command, the following unhandled exception error displays: Solution: Open the template (.dwt) file from the templates folder. Ensure that there are no hidden entities within the file. Only the Title Block ...What types of Licensing Options are available in HyDraw CAD?
To know more about the different Licensing Options available in HyDraw CAD refer to document below. https://www.vestusa.com/Download/Leverage-your-HyDraw-CAD-Investment.pdfHow to backup and restore HyDraw CAD Library MS Access version?
The attached PDF outlines the process required to create database backups or restore for HyDraw CAD when utilizing the Microsoft Access Database.